> For the complete documentation index, see [llms.txt](https://docs.udara360.io/llms.txt). Markdown versions of documentation pages are available by appending `.md` to page URLs; this page is available as [Markdown](https://docs.udara360.io/core-features/account/account-category.md).
# Account Category
The Account Category page allows you to manage chart of account categories, view their details, and perform actions like filtering and resetting filters. This guide will help you navigate the Account Category section and perform essential actions. Visit the [Create Account Category](https://docs.udara360.io/) page to create a new account category.
## Accessing The Account Category Page
1. Log into the application using your credentials.
2. From the dashboard, navigate to **Accounts** in the side menu.
3. Select **Account Category** from the dropdown list.
This page shows the account category **name**, **description**, **level**, **category code**, **parent name**, and **created date**.
## Create Account Category
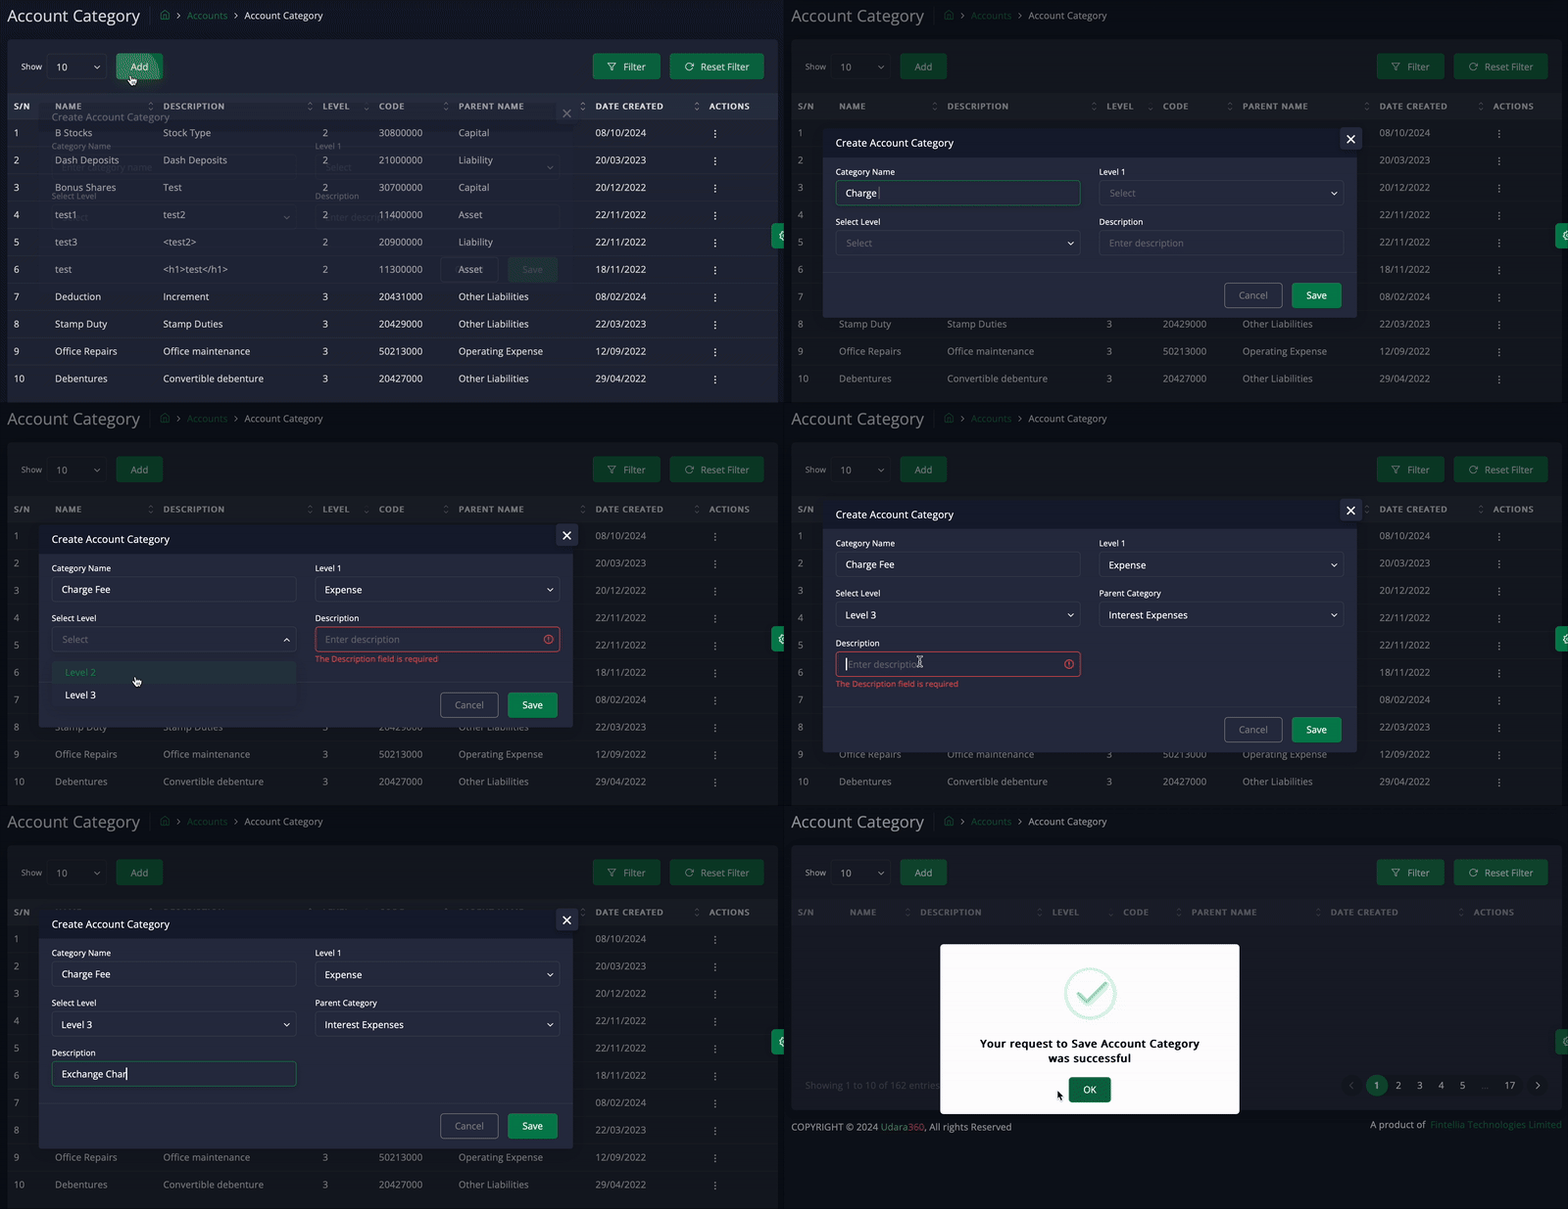
To create a new category, do the following steps:
1. Click the **Add** button at the page's top left
2. Fill in the following details:
* **Category Name**: Input your desired category name
* **Level 1**: Select the option under which your category falls
* **Level 2/3**: Select your subheading category level option
* **Description**: Provide a category description
3. Click **Save** to apply changes
4. Confirm the action by clicking **"Yes, I want to proceed"**, or **"No, thanks"** to cancel
## Managing An Account Category
To manage an existing category:
1. In the **Actions** column, click the **three vertical dots (⋮)** next to the category you wish to manage
2. Select the appropriate option:
* **View:** see the category's full details
* **Modify:** edit the category's details
## Filter a Category
To filter an account category, follow these steps:
1. From the side menu, go to **Account > Account Category**
2. Click the **Filter** button at the top right of the page
3. Input your filter criteria. You can filter by **Name**, **Code**, **Level**, or **Level 1**
4. Click **Apply** to complete
> :pushpin:Click **Reset Filter** to clear all applied filters and return to the full list.
{% hint style="info" %}
**Reset Filter**: To reset a filter, click the **Reset Filter** button at the top right of the page.
{% endhint %}